

This website contains affiliate links. Some products are gifted by the brand. As an Amazon Associate, I earn from qualifying purchases. The content on this website was created with the help of AI.
While I share money-making strategies, nothing is "typical", and outcomes are based on each individual. There are no guarantees.
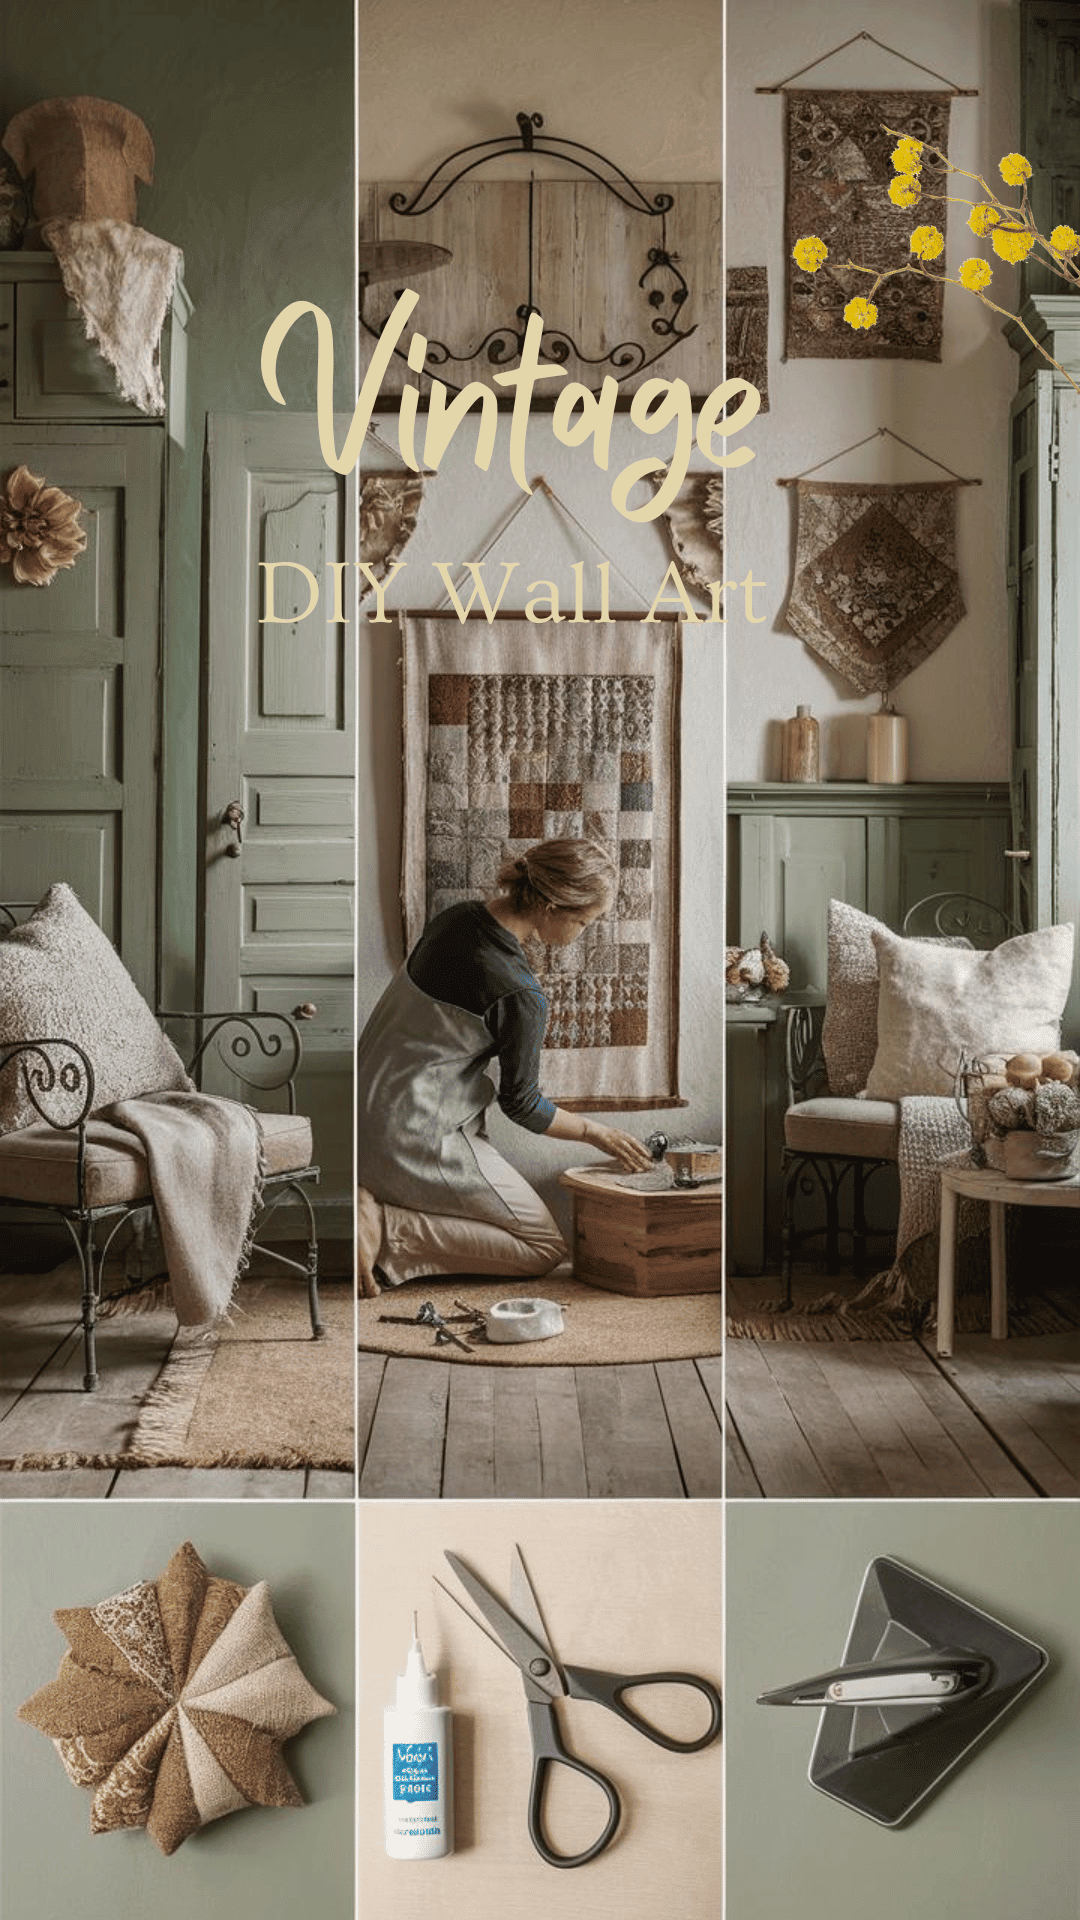
Make your home stand out with Vintage-Inspired Fabric Wall Art. It’s a great way to show off your style. Adding fabric wall art brings a big impact and lets you express your creativity. You can make your own fabric wall hangings with simple supplies and creativity. These will add vintage charm to any room.
Key Takeaways:
- Vintage-inspired fabric wall art is a great way to add a unique and personalized touch to your home decor.
- Creating your own fabric wall hangings allows you to express your creativity and style.
- With a few simple supplies, you can easily create beautiful fabric wall art that adds a touch of vintage charm to any room.
- Consider using different types of fabrics, patterns, and textures to create visual interest and depth in your fabric wall art.
- Don’t be afraid to mix and match fabrics to create a unique and eclectic look.
DIY Framed Vintage Textiles
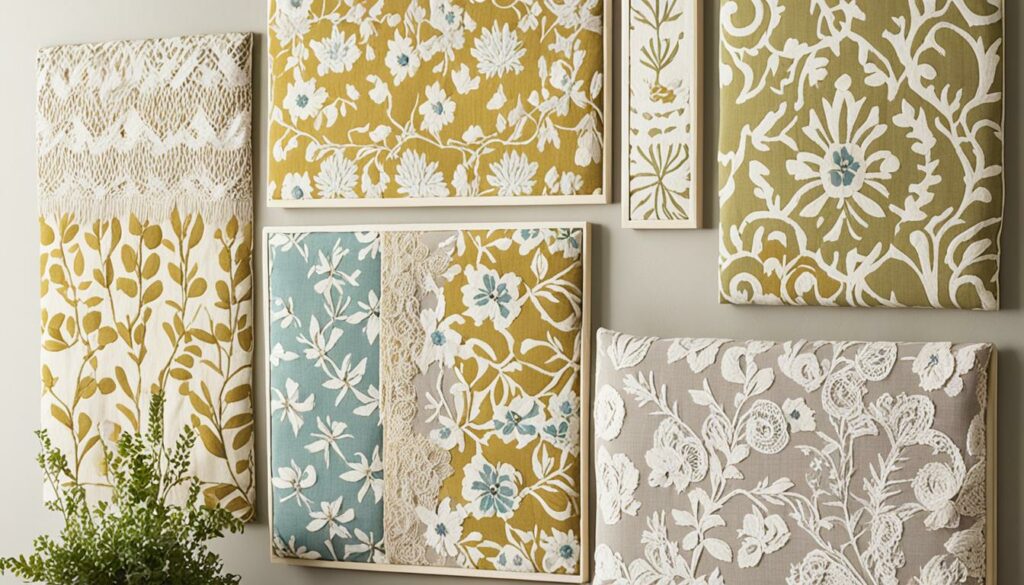
Creating vintage-inspired fabric wall art is easy with framing vintage textiles. You can use old pillow covers or fabric to make unique wall decor. Just follow a few simple steps to turn these textiles into beautiful art pieces. They add a nostalgic and charming touch to any room.
To start, you’ll need:
- Fabric scissors
- A frame of your choice
- Super glue
First, cut the seams and zipper from the pillow cover or fabric. This makes sure you have a clean piece to work with. Then, trim the fabric and iron it to remove wrinkles and make the edges crisp.
Next, remove the glass and backing from the frame. Place the fabric on the white sheet that came with the frame, making sure it’s in the center. This sheet will be the background for your art. Use super glue dots along the fabric edges to attach it to the sheet.
Let the glue dry before moving forward. Once it’s dry, put the fabric back into the frame. Replace the glass and backing to finish.
Your DIY framed vintage textile art is now ready to hang. You can use any size fabric to fit your space perfectly.
This project is a great way to show off vintage fabrics. It lets you express your style and add a unique touch to your decor.
You can frame many things like antique quilts, lace doilies, or patterned fabrics. This DIY method lets you create unique wall art. Try different textiles and frames to find the perfect match for your style.
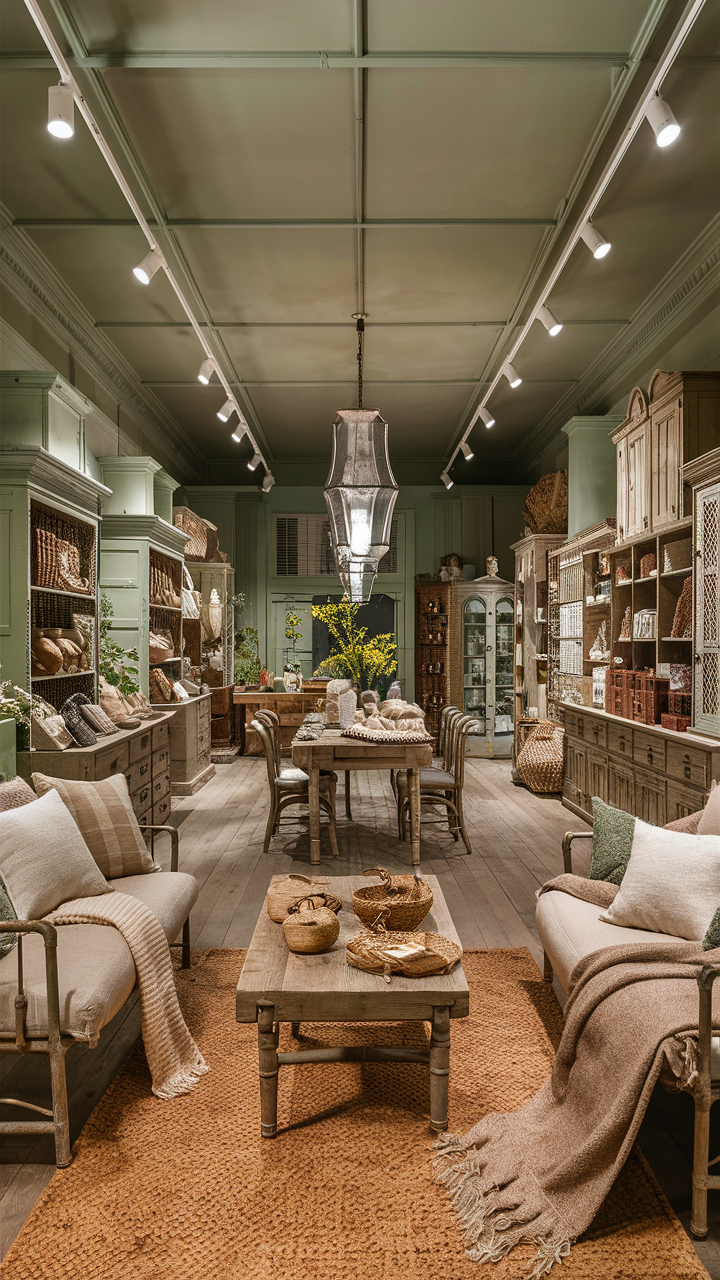
Creative Uses for Fabric in Home Decor
Fabric can be used in many creative ways to make your home cozy and inviting. You can frame vintage textiles or try other fabric uses to change your space. Whether it’s fabric wall decor, hangings, or custom accents, there are endless possibilities.
For fabric wall decor, think about using tapestries or hangings. These pieces add color, texture, and depth to any room. Pick fabrics that match your decor to make a statement piece. Hang it above a sofa or console table to catch the eye and show off your style.
“Fabric wall decor adds a unique touch to any room. It’s a great way to showcase your creativity and bring warmth to your space.”
Fabric can also soften and enhance your windows with custom treatments. Choose curtains, valances, or fabric blinds that match your room’s look. This makes your windows stand out and pulls the room together.
Customizable accents are another way to use fabric in your decor. Make fabric-covered frames that fit your space and hold special memories. This DIY project adds a personal touch to your walls. Or, wrap vases with unique fabrics to turn them into standout centerpieces.
Brighten up your space:
- Add pops of color with vibrant fabric throw pillows that complement your furniture.
- Create a cozy reading nook with a fabric canopy draped over a comfortable chair.
- Make a DIY fabric headboard to instantly update your bedroom.
With fabric, you can make custom decor that shows off your unique style. Experiment with different patterns, textures, and colors to add personality to your space.
Imagine a fabric-draped wall with a stunning hanging at its center. The mix of fabric textures and patterns creates a captivating and welcoming atmosphere. Add fabric-covered frames with your favorite artwork or photos around the hanging for a complete look.

Remember, customization is key in fabric home decor. Let your imagination guide you as you explore fabric’s endless possibilities. Create a space that’s truly yours.
Finding the Perfect Fabric for Your DIY Projects
Fabric is key when you want to add vintage charm to your home. It’s vital for DIY wall art or updating furniture. The right fabric makes all the difference in your project’s look.
Thrifting is a great way to find unique vintage fabric. Thrift stores are full of hidden gems for your home. Look for patterns, textures, and colors that catch your eye. Mixing different prints and fabrics can make your project stand out.
Local fabric stores are a good choice if you prefer not to thrift. They have many fabrics and accessories for DIY projects, from floral to geometric patterns.
When picking fabric, consider your space’s design. Consider colors, textures, and patterns that fit your decor. For a unique look, mix different fabrics together carefully.
The fabric you choose is crucial for your DIY project’s success. Make sure it’s high quality and right for your project. Whether it’s for a chair or wall art, choose fabrics that are durable and easy to work with.
Choosing the right fabric makes your DIY projects special and personal. So, start exploring thrift stores and fabric shops. You’ll find the perfect fabric to bring your home decor ideas to life.
Step-by-Step Guide to Creating Fabric-Covered Picture Frames
Fabric-covered picture frames add a personal touch to any room. With a few easy steps, you can turn old frames into beautiful fabric art. This guide will help you make your own fabric-covered picture frames.
Gather Materials:
- Old picture frames
- Cotton fabric in a color that matches your decor
- Mod Podge or collage glue
- Fabric scissors
- Ruler
- Pen
- Your choice of artwork or pictures
Prepare the Frame:
- Remove the back and glass from the frame.
- Choose frames that are simple and flat, without intricate details.
Measure and Cut the Fabric:
- Place the frame face down on the fabric and trace around it with a pen. Leave extra fabric around the edges.
- Use a ruler to draw squares at the corners of the traced shape. These squares will help create neat corners.
- Draw diagonal lines from the corners of the squares to the edges of the traced shape.
- Cut along the lines to create fabric pieces that will cover the front and sides of the frame.
Attach the Fabric:
- Apply Mod Podge or collage glue to the front of the frame, making sure it’s fully covered.
- Place the fabric piece onto the front of the frame and smooth out any wrinkles or bubbles.
- Apply glue to the sides of the frame and fold the fabric over, pressing it firmly to adhere.
- For the corners, fold the fabric tabs diagonally and secure them with glue to create neat and tidy corners.
- Trim any excess fabric with scissors.
Final Touches:
- Allow the frame to dry completely.
- Once dry, insert your choice of artwork or pictures into the frame.
Voila! Your fabric-covered picture frame is ready to be displayed. Hang it on your wall or place it on a shelf to add a personal touch to your home decor. Try different fabric patterns and textures to create a unique collection of fabric wall art that shows your style and personality.
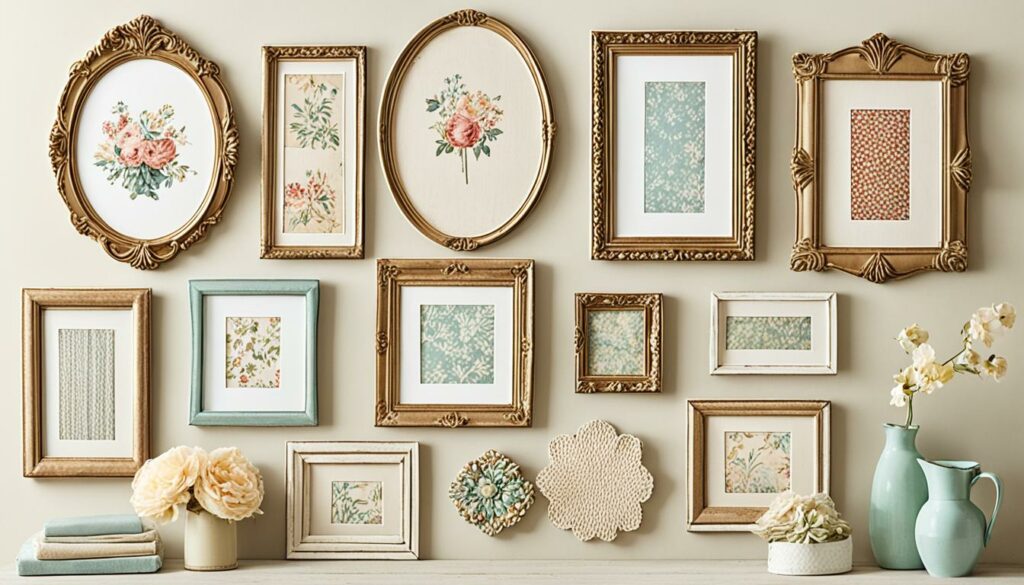
Tips for Arranging a Gallery Wall with Fabric-Covered Frames
After making your fabric-covered picture frames, it’s time to arrange them on your wall. You can arrange them in a grid for a classic look or in a cluster for a cozy feel. Or, go for a random pattern for something creative. Think about the wall’s size and the frames’ sizes and shapes. Try different placements to find the best arrangement. Make sure the frames look good and work well in your space.
Here are some tips to help you arrange a gallery wall:
- Begin by collecting all your fabric-covered frames. Lay them out on a big table or floor to see how they look together.
- Look at the wall you want to decorate. Notice its size, shape, and the room’s style. This helps you pick the right number of frames and arrangement.
- Try different layouts. You can arrange frames in a grid for a neat look or cluster them for a cozy feel. Let your style guide you.
- Use paper templates to plan your layout before hanging the frames. Cut paper shapes the same size as your frames and tape them to the wall. This lets you see the layout and adjust it before you hang the real frames.
- Think about adding mirrors, shelves, or other decorations to your wall. This adds depth and makes your display unique.
- Pay attention to the space between frames. Aim for a consistent gap for a balanced look.
Creating a gallery wall with fabric-covered frames is a great way to show off your creativity. It makes a statement in your room and adds beauty. For more tips and inspiration, check out this link.
Using Different Types of Art in Fabric-Covered Frames
Fabric-covered frames are great for showing off a variety of art. You can use them for personalized wall art, fabric art, or printable artwork. They offer endless possibilities for creativity.
Try mixing different art types for a unique look. Combine photos, fabric, and printable artwork for depth and interest. This mix can tell your story and show off your style.
Focus on one type of art to highlight it with fabric-covered frames. For instance, vintage posters or artwork look great with fabric. The fabric adds texture and charm, making the artwork stand out.
Adding a mat to fabric-covered frames can make your art look polished. A mat creates a clean border, focusing attention on the artwork. Or, you can let the fabric be the main attraction.
For fabric or printable artwork, pick fabric that matches the colors. This creates a cohesive look. By choosing the right fabrics, you can make your gallery wall stunning and emotional.
Check out a bathroom gallery wall on this website for inspiration. The author shares stories behind the artwork, showing the thought and emotion in each piece.
Fabric-covered frames let you experiment with different art combinations. Let your creativity shine and make a gallery wall that reflects your unique style.
Featured Art Pieces
| Artwork | Description |
|---|---|
| Printable Quote | A motivational quote in a stylish font, perfect for adding inspiration to any room. |
| Vintage Photograph | A black and white photograph capturing a moment from the past, adding a touch of nostalgia to your gallery wall. |
| Handmade Fabric Art | A unique and intricate fabric design created by hand, showcasing the beauty of textile art. |
Additional Tips for Creating Fabric Wall Art
To make sure your fabric wall art turns out great, here are some extra tips:
- Use quilting cotton for a sturdy and non-stretchy fabric option.
- Mix different patterns and colors to create a cohesive look.
- Consider using collage glue or Mod Podge for secure adhesion.
- Have a good pair of fabric scissors for precise cutting.
- Take measurements and plan ahead to ensure proper placement.
- Get creative and experiment with different fabrics, frames, and arrangements to make your fabric wall art truly unique and personalized.
“Experimenting with different fabrics, frames, and arrangements is one of the most enjoyable aspects of creating fabric wall art. Don’t be afraid to think outside the box and let your creativity shine.”
For more detailed guidance and inspiration, you can check out this useful resource. It gives tips on making fabric wall art with picture frames and fabric. It suggests using cotton fabric and various patterns for a unified look. It also has a step-by-step guide on covering frames with fabric.
The content also talks about arranging framed art on walls. It mentions grid, cluster, or random patterns. It stresses the importance of considering wall and frame sizes, artwork colors, and trying out different layouts. This can help you create beautiful gallery walls.
Conclusion
Vintage-inspired fabric wall art is a great way to make your home unique and nostalgic. By using old textiles and different fabric decor ideas, you can make pieces that show off your style. This lets you express your personality in your living spaces.
This article has shown you how to be creative with fabric art on your walls. You can hang a single frame or create a whole gallery wall. Each piece will have its own story and make your home more interesting.
If you want to learn more about vintage home decor, check out this helpful guide. Remember, the key to a good look is mixing style and color while keeping your taste in mind. So, let vintage-inspired fabric wall art be a big part of your home decor.
FAQ
How can I create vintage-inspired fabric wall art?
You can make vintage-inspired fabric wall art by framing old textiles. Use old pillow covers or fabric to make unique art. You’ll need fabric scissors, a frame, and super glue.
Cut the seams and zipper out of the pillow cover. Trim the fabric edges. Iron them to get rid of wrinkles.
Put the textiles in the frame’s center and glue them down. Let it dry, then put the frame together. You can use any size textile or frame to match your space.
How can I use fabric in home decor?
Fabric is great for adding a personal touch to your home. You can frame vintage textiles or use fabric for walls, windows, pillows, and floors. It adds color and texture.
Try making fabric wall hangings or tapestries. Or, use fabric for custom home accents like picture frames or vases. Fabric lets you be creative and add a personal touch.
Where can I find the perfect fabric for my DIY projects?
Look for the perfect fabric at thrift stores or local fabric shops. Thrift stores have affordable fabrics for DIY projects. Local shops offer new fabrics and accessories.
Think about the fabric’s texture, color, and pattern. Make sure it fits your decor theme.
How can I create fabric-covered picture frames?
Making fabric-covered picture frames is easy and budget-friendly. Gather old frames, cotton fabric, and some glue or Mod Podge. Use fabric scissors and a ruler too.
Cut the fabric bigger than the frame. Draw squares and lines for the corners, then cut them out. Glue the fabric on the frame, fold and glue the corners, and trim the edges.
Let the frame dry, then add your favorite pictures or artwork. Your fabric-covered frame is now ready.
How can I arrange fabric-covered frames on a gallery wall?
Arrange your fabric-covered frames on a wall for a stunning gallery look. You can use a grid, cluster, or random pattern. Think about the wall and frame sizes.
Plan the layout and take measurements. Make sure the frames look good together and fit your space well.
What types of art can I display in fabric-covered frames?
You can display photos, fabric pieces, or printable art in fabric-covered frames. Mix and match to create a unique look. Choose whether to use a mat or not, based on your style.
This lets you add your personal touch to the fabric art. Be creative and try different things to make your frames stand out.
What are some additional tips for creating fabric wall art?
For successful fabric wall art, use quilting cotton for durability. Mix patterns and colors for a cohesive look. Use collage glue or Mod Podge for a strong hold.
Have sharp fabric scissors and plan your project well. Be creative with fabrics, frames, and arrangements to make your art unique.